Problem
You need to configure the Linphone softphone app to access your ClusterPBX SIP account over a secure TLS channel.
Intended Audience
Step-by-Step Guide
If you are on the un-encrypted service – or are unsure if your service plan offers encryption – you may want to follow the simpler steps for configuring the application: How-to Install and Configure Linphone
- Download Linphone for the desired platform from the official web site
Direct links for Windows
Other versions and Operating Systems
- Install the application
- Windows: run the setup
- Mac OS X: Open the .dmg file and drag the file to the Applications folder
- Smartphones/Tablets: User their respective appstore
- Open the Linphone application
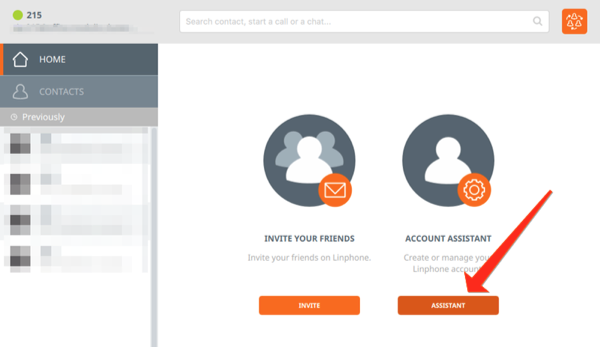
- Click the ASSISTANT button to start the configuration assistant
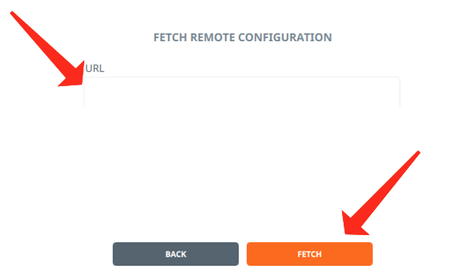
- Click the FETCH REMOTE CONFIGURATION button

- Enter the URL provided below under FETCH REMOTE CONFIGURATION
URL
https://www.clusterpbx.cloud/assets/linphone_srtp_base.xml - Click the FETCH button to download the security certificate
- Click Confirm when asked if you want to reboot now to apply the change
- Click the ASSISTANT button on the application’s main screen
- Click the USE A SIP ACCOUNT button on the WELCOME screen

- Enter the information of your SIP account as found on your ClusterPBX account’s My Softphone page (available only to User accounts)
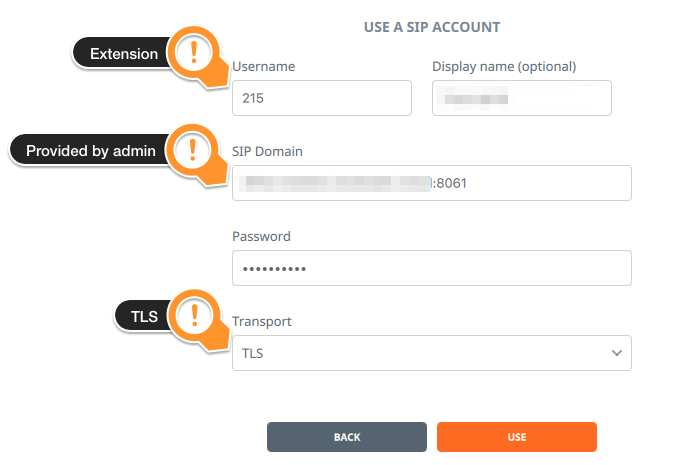
- Username: User Name on the My softphone page (your extension)
- Display name (optional): you may want to type your name there
- SIP Domain: the Server on the My Softphone page – also your ClusterPBX realm – add port :8061 to the server name
Example
xxx.yyy.clusterpbx.zzz:8061 - Password: your softphone password – Secret on the My softphone page
- Transport: pick TLS
- Click the Use button when all the information is entered
- Click the Active account button at the top right to switch to the account you just created
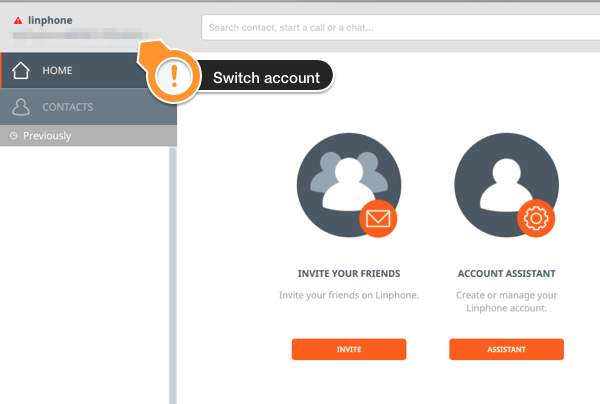
- Select the account under the Active account drop down menu
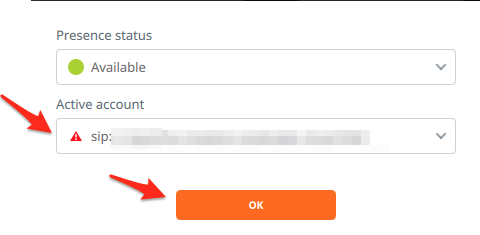
- Click OK to connect to it – You are done, unless you are on an encrypted VoIP system
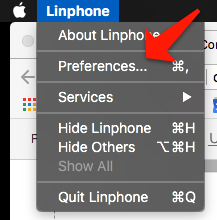
- Go the application’s Preferences
Windows

Mac OS X
- Under the SIP Accounts tab, Edit your account by pressing the edit button (
 ) beside the sip account

- Change the Registration duration (sec) value to 600
- Click Publish presence information
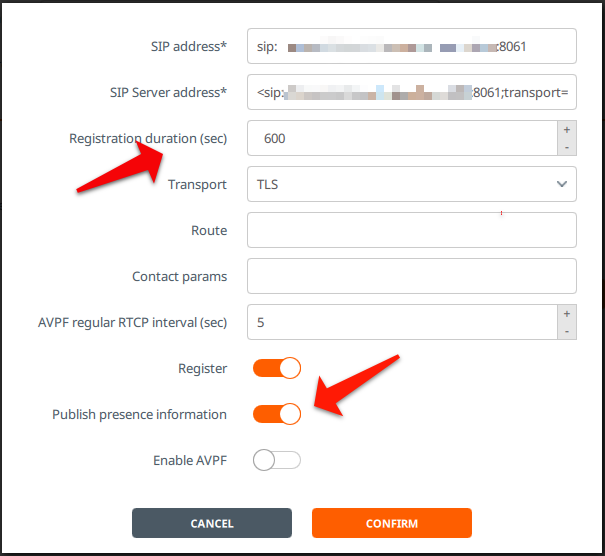
- Click the Confirm button
- Click the Calls and Chat tab

- Select SRTP encryption – that will work only if you are on a connection encrypted with TLS
- Pick your desired Language from the dropdown menu under the User Interface tab (the default is your system language)
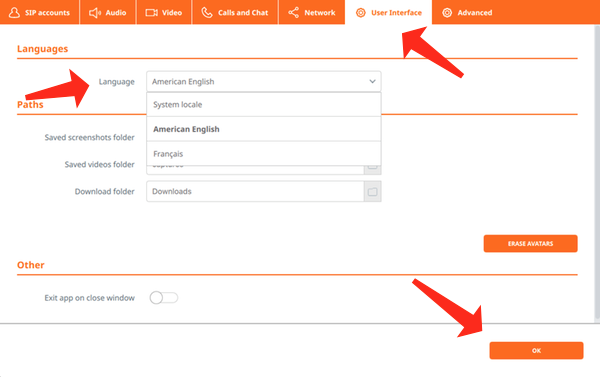
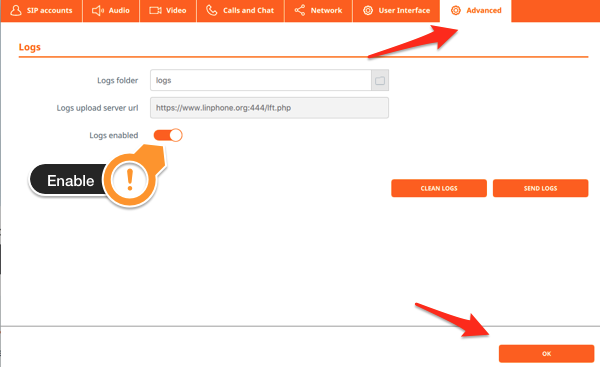
- (Optional) Click the Advanced tab and activate the Logs enabled option
Your communications are now secure.
Version Information
This document was verified on Linphone version 4.11 for Windows and Mac OS X.