Information
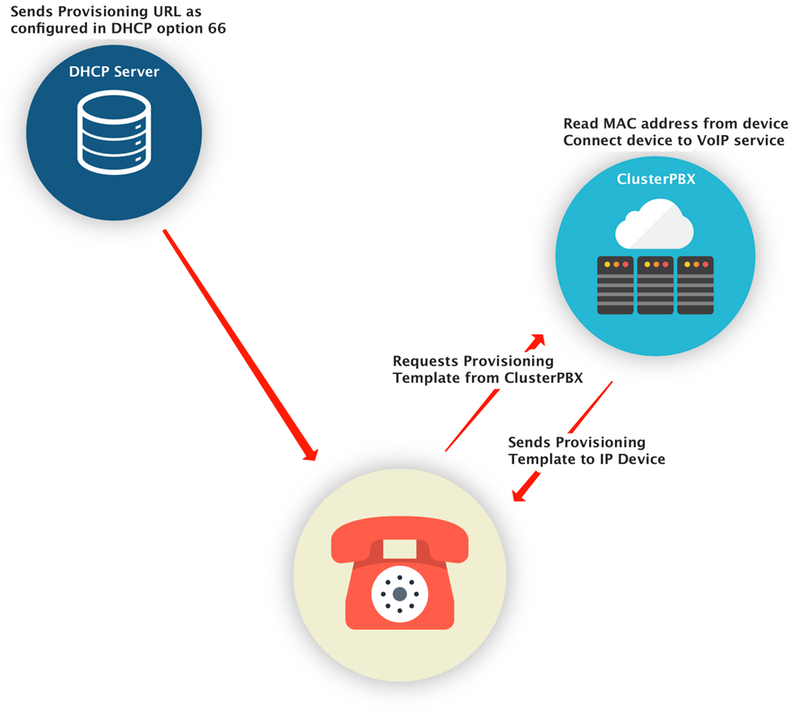
When option 66 is properly configured in your organisation’s DHCP server phones will be able to auto provision without manual intervention, as their provisioning URL will be provided by the DHCP server when they connect.
Intended Audience
Admin
Reference
Overview
DHCP option 66 is an option that DHCP hand out to clients that tells them where to go to get server configuration information (ClusterPBX provides both FTP and HTTP provisioning URLs on a per account basis). This is used for many different types of devices, but we use it to allow phones and other VoIP devices to let them automatically download their configuration files from ClusterPBX according to their MAC address (for a phone to auto provision it must be attached to a User account), this feature greatly facilitate medium or large deployments.
If you need to configure phones that require different URL formats they can be set on different VLANs to allows them to download their respective configuration correctly (the DHCP server can send different Option 66 values for each VLAN).
Configuring Option 66 on the DHCP Server
Not all DHCP servers have the capability to add or change the scope, most consumer grade routers or firewalls DHCP built-in server do not offer this functionality.
Refer to the administration guide of the specific DHCP server model/brand to know its capabilities.
This document provides basic overview of the configuration process for some common DHCP servers.
Server configuration overview
Microsoft DHCP
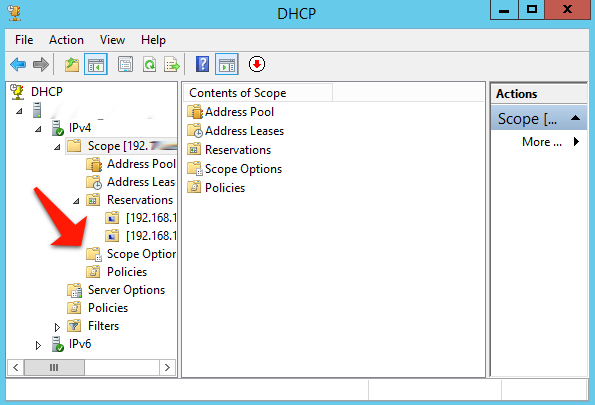
You set DHCP options in the DHCP snap-in found in Server Manager (Administrative tools → DHCP).
- Open the DHCP Server applet
- Navigate to the IPv4 Scope to Scope Options
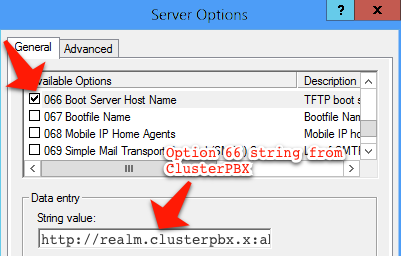
- Right click and select Configure Options…
- Scroll down to find Option 66 Boot Server Host Name
- Enter the Option 66 URL from ClusterPBX into the String Value field
The URL is found under your client account Provisioning Template → Provisioning Configuration and Informations in the Option 66 section
The process will differ depending on the scope (Global, Reservation or Dynamic) these steps assume a Global scope.
Cisco ASA DHCP
- Connect to the Cisco DHCP ASA device
- Type dhcpd option number value
Example:
dhcpd option 66 http://realm.clusterpbx.xyz:abc1234@clusterpbx.xyz/p/$MAC.cfg
The URL is found under your client account Provisioning Template → Provisioning Configuration and Informations in the Option 66 section
Linux DHCPD
Add the following lines to the dhcpd.conf file (replace the URL with the one from ClusterPBX)
option boot-server code 66 = string;
option boot-server “http://realm.clusterpbx.x:abc1234@clusterpbx.xyz/p/$MAC.cfg”;
Be sure that the password does not have an @ in it, that will conflict with the string format.
The URL is found under your client account Provisioning Template → Provisioning Configuration and Informations in the Option 66 section
Ubiquiti EdgeRouter
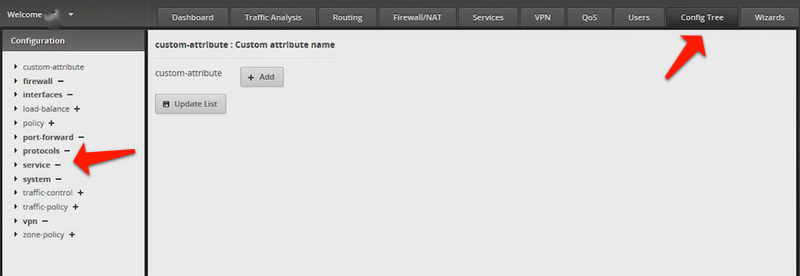
- Login to your Ubiquiti EdgeRouter web interface
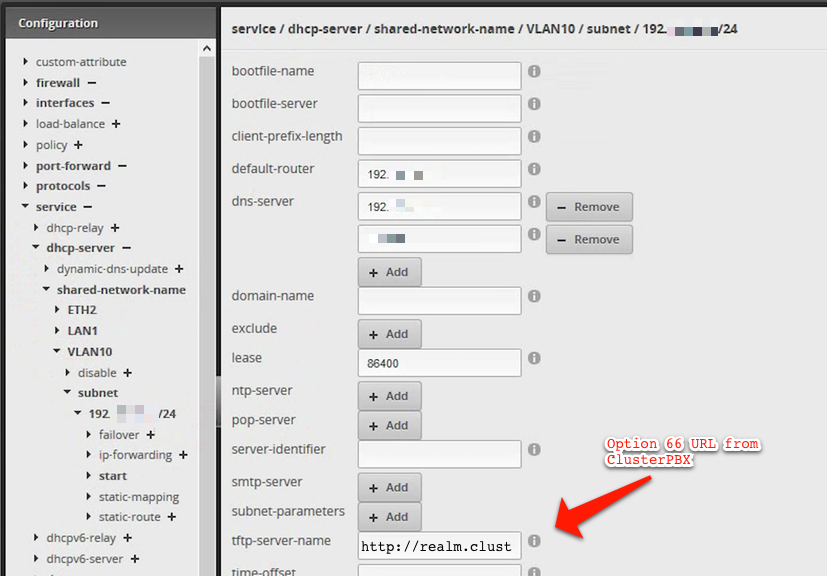
- Go to Config Tree (if you have a VLAN configured, select the VLAN where Option 66 will be configured)
- Navigate to Service / dhcp-server / shared-network-name / LAN or VLAN name / subnet / IP/range
- Enter the URL for DHCP Option 66 found on your ClusterPBX client account in the tftp-server-name field
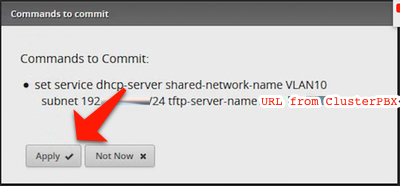
- Click Preview at the bottom of the configuration window to see a preview of the command that will be sent to change the router’s configuration
- Click Apply and wait until you see the message The configuration has been applied successfully
The URL is found under your client account Provisioning Template → Provisioning Configuration and Informations in the Option 66 section
This configuration can also be done through an SSH connection on the router itself using the commands shown in the Commands to commit window when previewing the changes.

