How-to configure the Phone provisioning to access the provisioning template attributed to the phone, user and extension on their ClusterPBX instance.
Note that each phone can be provisioned to their user/account’s need and technical requirement and instance of ClusterPBX, thus the details of your specific configuration will be provided to your by your telephony administrator.
Intended Audience
Step-by-Step Guide
A provisioning template must be configured for each user (extension) before they can be used, see the document How-to Create a User Account for detailed instructions on how to configure an extension, including the provisioning template.
If the template does not exist – a system administrator must create a template that is compatible with the phone being provisioned: Reseller – Provisioning Templates
Caution: Any configuration changes made through the phone’s web interface will override provisioning server configurations.
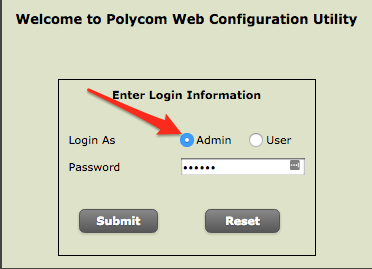
- Login to the phone’s web interface as Admin
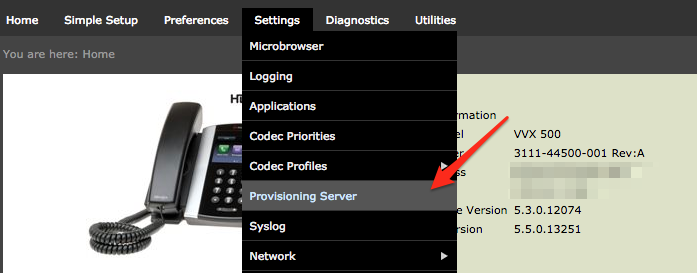
- Go on to Settings then Provisioning Server
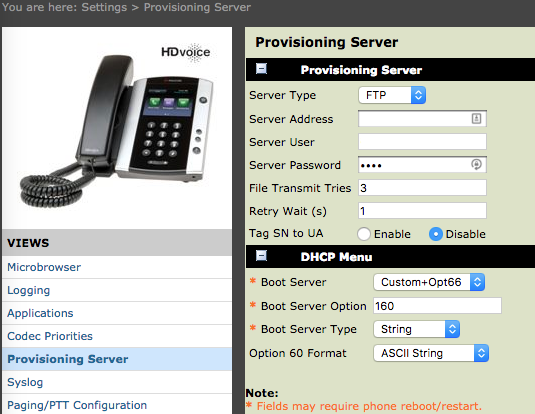
- Enter the Provisioning Server information
Provisioning Server
- Server Type: Pick HTTP
Some instances of ClusterPBX use FTP to send the provisioning template to the phones, in this case the FTP address will be displayed below the HTTP link inside the notice (HTTP provisioning is always active).
- Server Address: Enter the URL from the Provisioning Templates → Provisioning Password tab
- Server User: Enter the username from the Provisioning Templates → Provisioning Password tab
- Server Password: Enter the Password from the Provisioning Templates → Provisioning Password tab
- Server Type: Pick HTTP
- If needed configure the DHCP Menu section’s Boot Server option in accordance to how your ClusterPBX instance is configured
- Click the Save button at the bottom to complete the operation – the phone may have to reboot to apply the new configuration


