Description
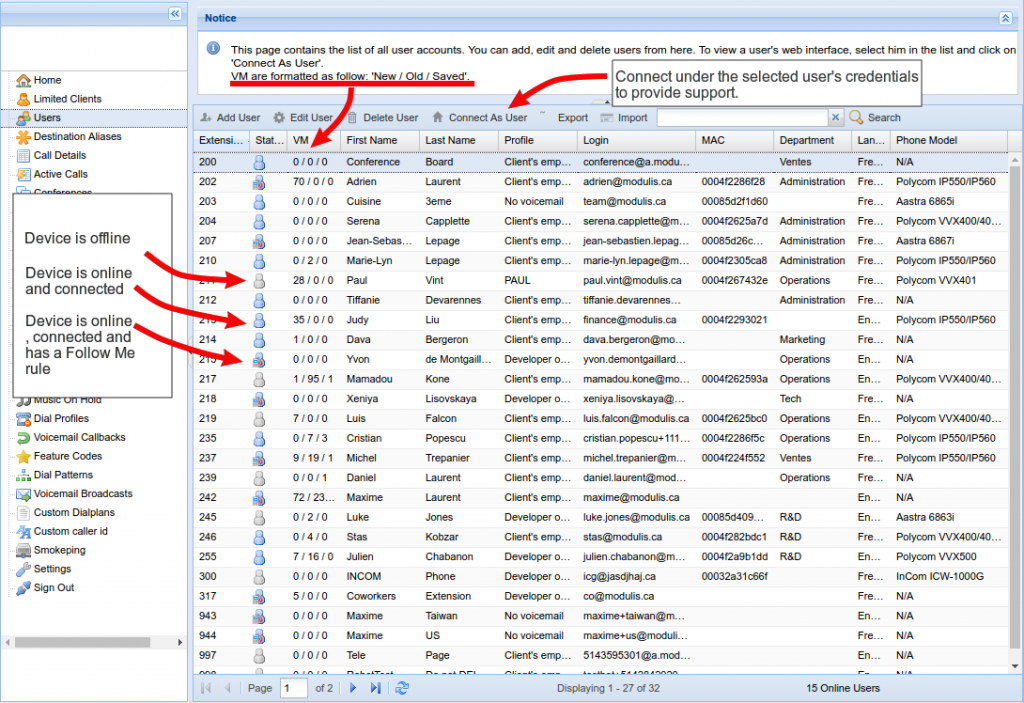
On the Users page you can view the list of all user level accounts. For the purpose of ClusterPBX, a User is an account associated to a unique extension, voicemail and a unique email address.
Associating a physical device to the account is not mandatory.
Overview
User Update and Creation Window details
General Tab
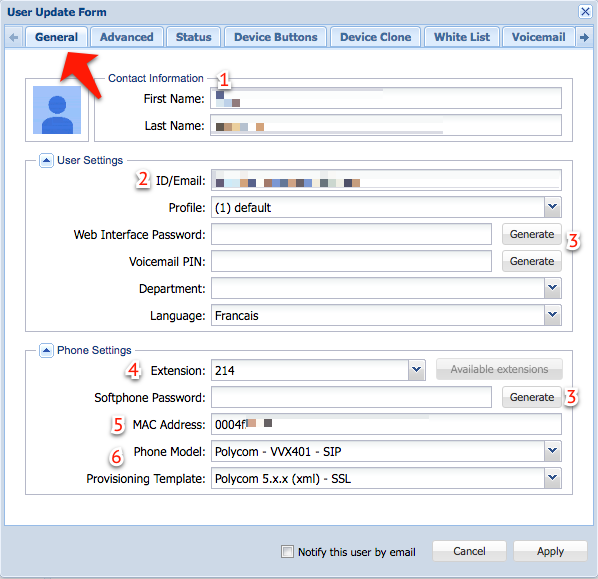
All the mandatory fields are on the General tab, every settings on the other tabs is optional.
- First Name and Last Name: is used as the default value for the CallerID feature.
- ID/Email: is used when logging to the web interface with the Web Interface Password – it must be unique.
- Passwords: ClusterPBX has 3 different passwords, one for the Web Interface, a PIN for the voicemail and another one for the Softphone, click Generate to create hard to guess passwords automatically.
- Extension: Each user account must have a unique extension, you can click the Available extensions button to see a list of free extensions.
- MAC Address: Locate the phone’s MAC address (usually on the back) – this is not necessary for softphone users.
- Phone Model & Provisioning Template: Pick the desired phone model in the first menu, the relevant templates will be made available in the menu below.
Advanced Tab
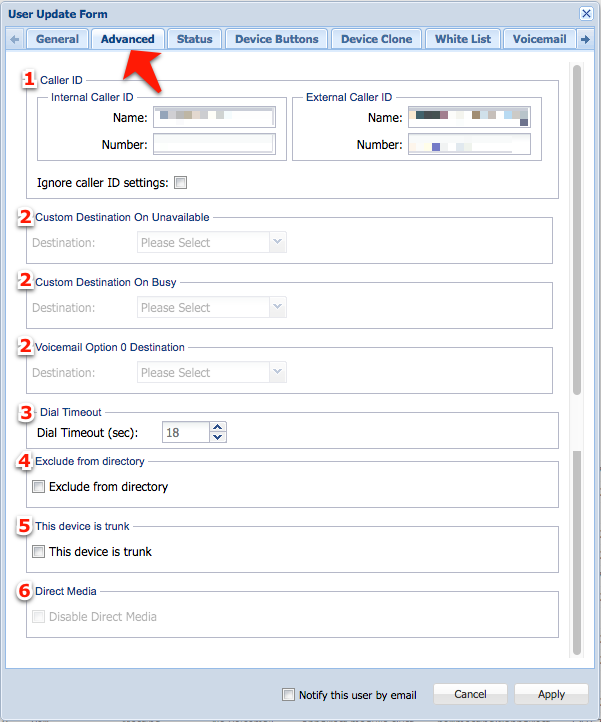
- Caller ID: This option allows the option to overwrite the Caller ID separately for the internal and external calls.
- Custom destinations: These destinations can override the Voicemail box with different destinations when the user it unavailable, their line is busy or the caller press the 0 key.
- Dial timeout: time in seconds before a call is routed to the voicemail box.
- Exclude from directory
- This device is trunk: Enable this option when the When activated CallerID is controlled by the remote PBX (ignoring any local ClusterPBX option).
- Direct Media: when the Disable Direct Media option is active calls will be forcibly routed through the Asterisk proxy instead of using peer-to-peer connection whenever it’s possible.
Status Tab
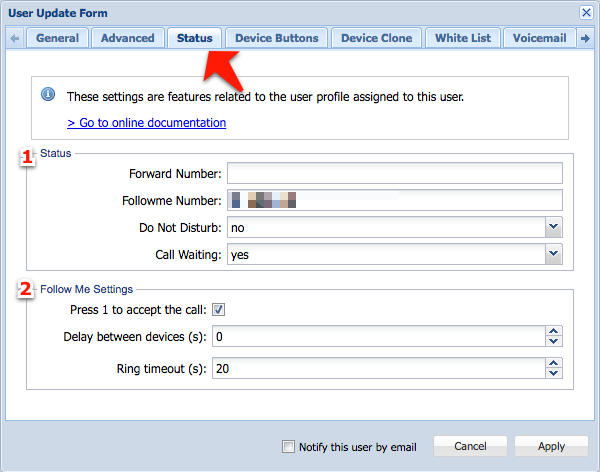
- Status: The status section allows for the configuration of the following options:
- Forward Numbers: Calls will be forwarded to the specified number (extension or complete phone numbers are valid entries).
- Followme Number: The number entered here will ring at the same time as the main device configured for the extension, either can answer incoming calls.
- Do Not Disturb: If set to yes callers will be sent directly to voicemail.
- Call Waiting: When active a beep will advise that there is a call on the second line, optionally you can answer the second line or keep the conversation going, after the voicemail timeout period the second caller will be directed to the voicemail.
- Followme Settings:
- Press 1 to accept the call: you will have the option to press 1 before taking the call on the followme device.
- Delay between device (s): Delay, in seconds, before the followme devices start ringing.
- Ring timeout (s): Delay, in seconds, before the caller is redirected to the voicemail.
Device Buttons Tab
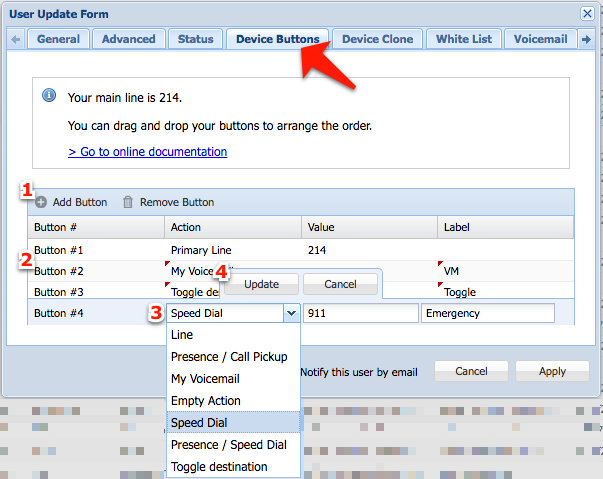
- Toolbar: Click the Add Button to Remove Button to add or remove a button from the list
- Button #: Each button has an Action, Value and Label are optional
- Action types: Pick the desired action for the button
- Line
- Presence / Call Pickup
- My Voicemail
- Empty Action
- Speed Dial
- Presence / Speed Dial
- Toggle destination
- Buttons: Cancel or Update changes made on the line when all is done.
Device Clone Tab
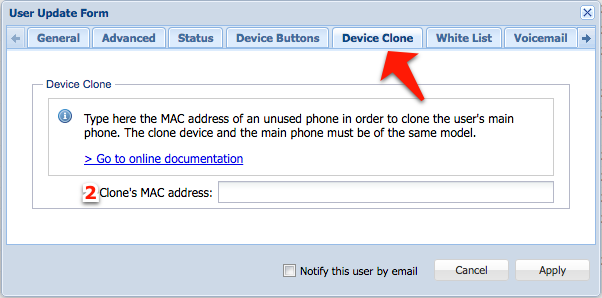
- Clone’s MAC address: Enter the MAC address of an unused phone to clone its configuration over to the user’s main phone, a typical use case will be a user
Both devices must be the same model and user the firmware version.
White List Tab
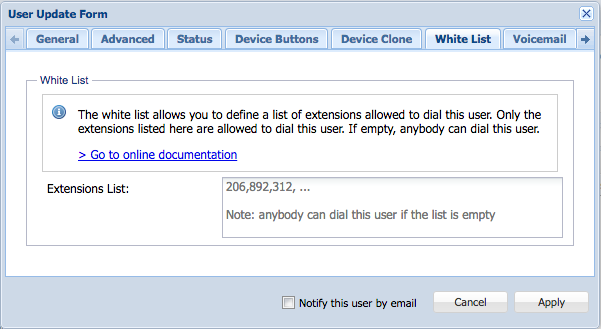
Extensions List: Only the extensions (comma separated) listed on the White List tab can dial to the user.
If the list is empty anybody will be able to dial to this account.
Voicemail Tab
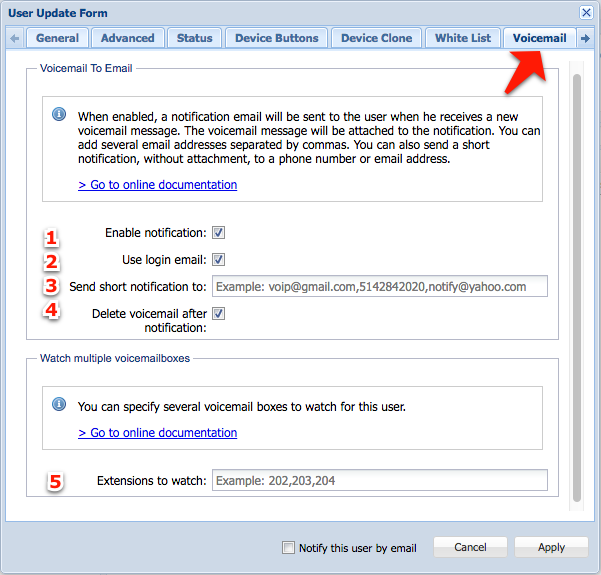
- Enable notification: A notification email, with the message attached to it, will be sent to the user when they receive a voicemail message
- Use login email: The notification email will be sent to the user’s ClusterPBX email address
- Send short notification to: The short notification is a copy of the voicemail notification message without the attachment
- Delete voicemail after notification: The original message will be deleted after the notification email is sent
- Extensions to watch: a user can monitor other users mailboxes if desired
Custom Provisioning Tab
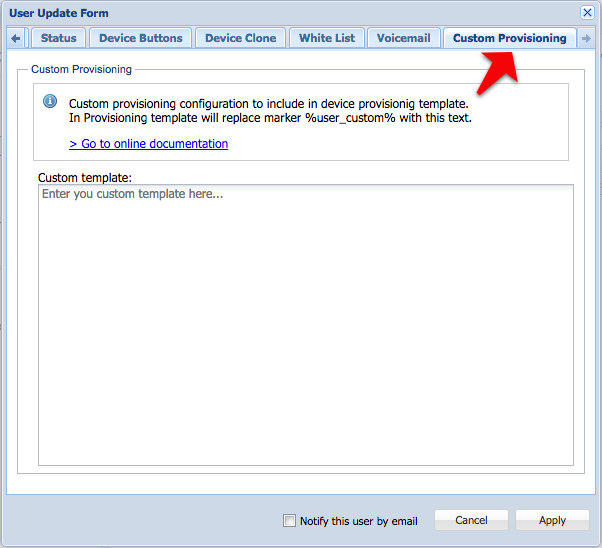
Custom template: Write your custom provisioning template according to your hardware.
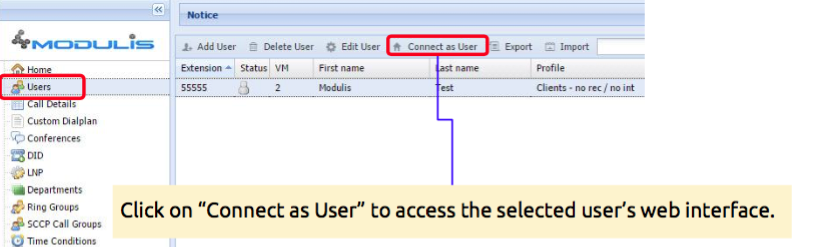
Connect as User